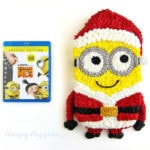
Minion Santa Cake
Prep Time
45 mins
Total Time
45 mins
Transform a simple sheet cake into an adorable Christmas Minion using basic piping techniques. Perfect for Despicable Me fans!
Course:
Dessert
Cuisine:
Christma
Keyword:
decorated cake, minion cake
Servings: 1 cake
Ingredients
- 9x13 inch baked sheet cake
- 2 ½ cups red frosting
- 1 ½ cups white frosting
- ⅓ cup silver gray frosting
- ½ cup black frosting
- 2 tablespoons gold frosting
- 1 ¼ cups yellow frosting
Instructions
-
Carve an oblong shape out of the cake.The bottom edge can be a bit more flat.
-
Cut one of the cake scraps into a Santa hat and attach it to the top of the cake using red frosting.
-
Spoon all the frosting colors into individual pastry bags, each fitted with a star tip, reserving half of the black frosting.
-
Spoon the reserved black frosting into a pastry bag fitted with a #3 or #4 round tip.
-
Decorate the cake by piping stars all over the surface and sides.
-
Start by making a red Santa Hat with a furry white rim. To make the white fur you can pipe stars or swirls.
-
Pipe on two silver gray circles for the Minion's goggles.
-
Pipe a small black circle in the middle of those circles then fill in around the black circle using white frosting to make the eyes.
-
Pipe a gray line one either side of the goggles then pipe a black band down the sides of the cake for the goggle straps.
-
Pipe on the red coat, black belt, and white fur trim.
-
Pipe on a gold belt buckle.
-
Pipe yellow above and just below the goggles.
-
Pipe red frosting onto the cake board to create arms then pipe on black gloves.
-
Pipe red frosting onto the cake board below the Minion to create two legs then then pipe on black shoes.
Recipe Video
Recipe Notes
- To make this cake, you carve a simple oblong shape out of a 9-inch by 13-inch sheet cake, then pipe frosting stars over the top. It's one of the simplest cake decorating techniques you can use, and I love it.
- I started by finding a picture of a Minion in a Santa suit and used that as my guide. If you need to, you can print out an image in a size that will fit your cake, then cut out around the pieces, lay them on your cake, and mark around them so you know where to pipe on the frosting. If you can freehand the design, go for it; otherwise, create yourself a template. That's what I did. In the video, you'll notice guide marks on my cake.
- To get a really vibrant red frosting, you may need to use quite a bit of red coloring. I suggest you color the frosting a day ahead, cover it, and refrigerate it overnight. The red will intensify as it sits. That way, you won't need to use as much coloring.
- For black, start with chocolate frosting and add black food coloring.
- To get shimmering gold, add some edible gold luster dust to the yellow frosting.