These Ice Cream Cone Candy Pops are a fun summer treat that everyone will love! Make them with your friends and family for some delicious desserts.

Hello, Hungry Happenings readers! Thank you to Beth for letting me visit today. I'm Meaghan, of the decorated cookie (and a longtime fan and friend of Beth).
My blog is all about simple but sweet food crafts, and I wrote the book Sugarlicious. Here is a sampling of what you'll find on my site:
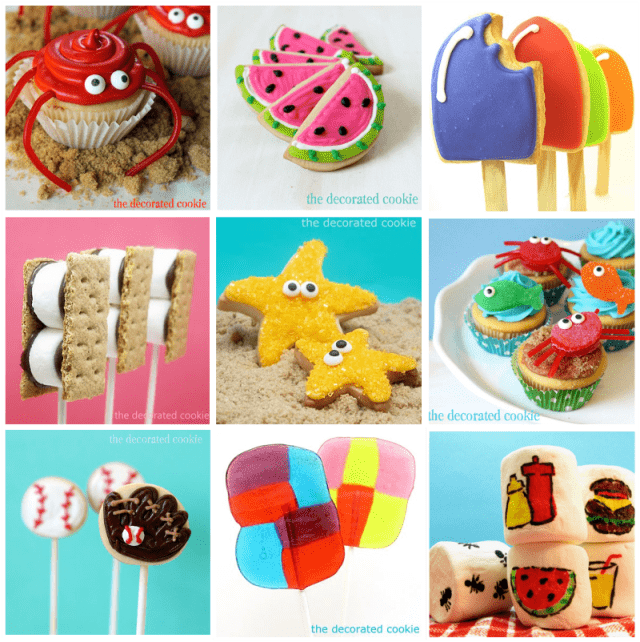
crab cupcakes, watermelon cookies, popsicle cookies, s'mores on a stick, starfish cookies, crab and fish cupcake toppers, baseball cookie pops, easy candy pops, BBQ marshmallows.
My favorites to decorate are cookies and marshmallows, but following close are candy pops because they are so quick and easy to make. All you have to do is melt any color of candy melts in disposable decorating bags, pipe any design you like, add a lollipop stick and wait an hour. Instant, fun, kid-friendly treats for any occasion.
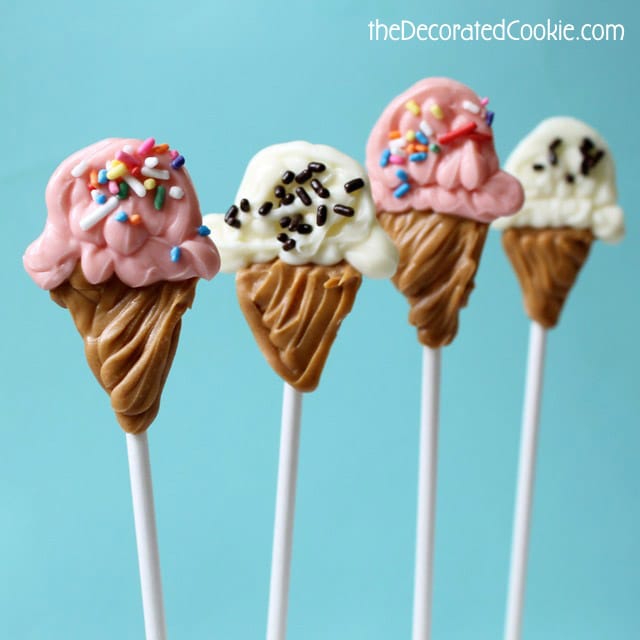
Here, in honor of (the sweltering hot) summer--give me winter any day--I'm making "ice cream cone" candy pops.
How to make "ice cream cone" candy pops
Ingredients
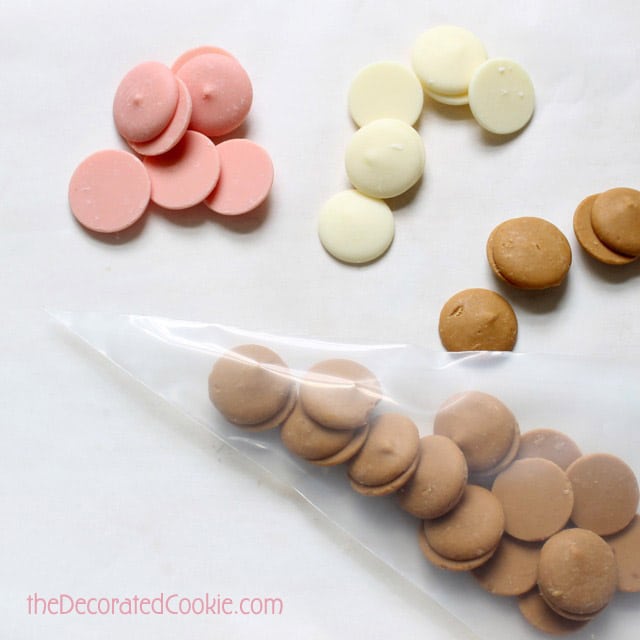
candy melts, light brown, pink, white (or any ice cream color)
candy melts
sprinkles
Supplies
disposable decorating bags
lollipop sticks
scissors
baking tray
parchment or wax paper
*Find the decorating bags, sprinkles, lollipop sticks, and candy melts in the craft store. For candy melts, you'll need light brown (chocolate or peanut butter flavored), pink, white, or any other color "ice cream flavor" you like.
Instructions
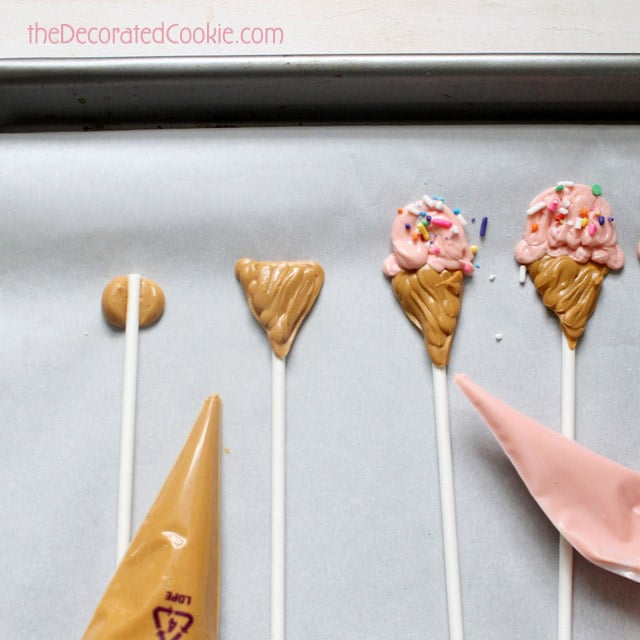
Line a baking tray or trays with parchment or wax paper. Place about ½ cup of brown candy melts in a disposable decorating bag. Microwave for 90 seconds at 70 percent power, then at 30 and 15-second intervals until fully melted. Twist the top closed and snip ¼ inch from the tip of the bag.
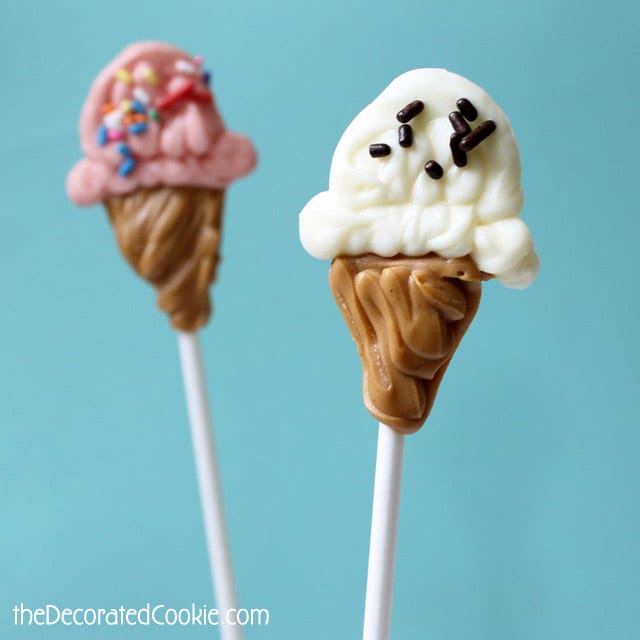
Pipe a dot of candy melts on the baking tray and place a lollipop stick on top. For the cone, pipe a triangle on top of the lollipop stick.
Fill the tray with your cones. In another disposable decorating bag, melt a different color of candy melts, just as you did with the brown.
Pipe the "ice cream" on top of the cone and immediately add sprinkles, if desired. Let set well, about an hour.
TIP: Candy melts harden quickly, so only melt and work with one bag at a time.
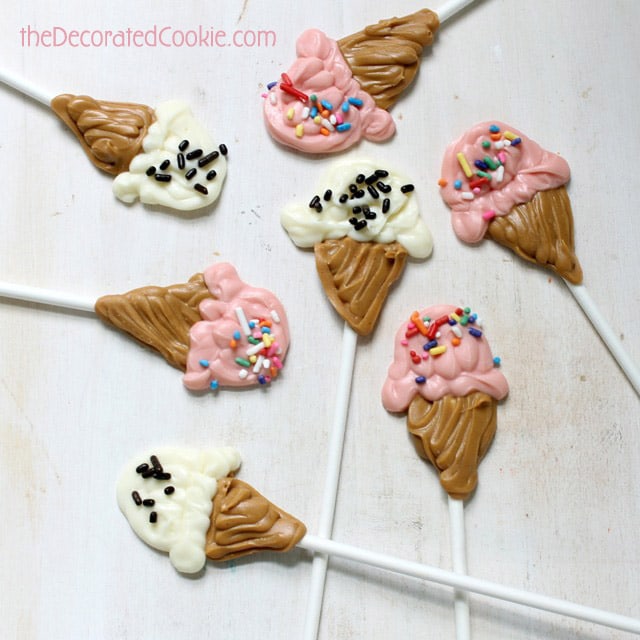
See? Easy peasy.
Thank you for letting me stop by!
Meaghan
Related Recipes

- How to make peanut butter? - February 15, 2024
- OREO Penguins - December 20, 2023
- OREO Snowmen - December 20, 2023
Lisa@hooplapalooza
oooo! easy, fun, sprinkles?! it's a must do! 🙂
Brenda @ SweetSimpleStuff
Meaghan ... you did it again! These ice cream cones are sooo cute ... love the texture that you get from piping the candy!
Erlene A
Such a cute idea and something I think my girls could make on their own.
beth
Thanks, Meaghan for sharing such a cute edible craft project!
the decorated cookie
Good eye, Karen, good eye. 🙂
Sue
So cute, Meaghan! Simple is the best! 🙂
The Bearfoot Baker
Ice cream cones are always cute but these are super cute on the stick and with the texture from the candy melts. They are adorable!
Karen @ Sugartown Sweets
So cute! As soon as I saw these I thought, this looks like something Meaghan would create! Love it. 🙂
June Baby
Adorable! Love it. 🙂
Project Denneler
Simple & sweet is hard to beat. These are really great, Meaghan!
the decorated cookie
🙂 !
The Partiologist
Meaghan, these are so sweet, love how cute they are on a stick!
the decorated cookie
Thank you so much!!