Create your own Family Tree Cheesecake. This is the perfect dessert to impress the women in your family on Mother's Day and show them how important family really is! If you can draw a simple tree, you can decorate this festive cheesecake.

This cheesecake topped with a personalized family tree will make a wonderful dessert to serve on Mother's Day, Father's Day, or even grandparents' day.
It would also be a fun treat to give to a new mother after the birth of her child.

With Mother's Day fast approaching, I began to think about all the branches on our small family tree.
I always imagined I'd add a few leaves to those branches, but that didn't happen. Mother's Day is a bittersweet holiday for me. I love my mom and celebrate all that she is, but this holiday reminds me of what I missed out on in life by not having children of my own.
Dwelling on that doesn't change things, so instead, at this time of year, I focus on the special relationship I have with my mother. I am so lucky to have her in my life.

The family tree design I chose for my cheesecake is whimsical, just like my mom's.
Your tree doesn't have to look exactly like mine. Just connect with your inner child and draw whatever speaks to you. A big green puff on top of a trunk would look great filled with apple-shaped nameplates. So would a simple line drawing of a tree filled with red, yellow, and orange leaf nameplates.
There are so many possibilities. Just have fun.

Family Tree Cheesecake
recipe adapted from Tyler Florence's Ultimate Cheesecake recipe
Ingredients:
Crust-
1 ½ cups graham cracker crumbs (from about 23 graham cracker squares)
6 tablespoons (¾ of a stick) butter, melted
Filling-
24 ounces (3 blocks) cream cheese, softened
1 cup sugar
3 large eggs
1 cup sour cream
1 teaspoon vanilla extract or vanilla paste
1 teaspoon cocoa powder
Decorations-
2 ounces light green modeling chocolate or fondant
thin tip black food coloring marker
Supplies:
Square Spring Form Pan
roasting pan (to make water bath)
leaf plunger cutter or small metal cutter
Instructions:

Preheat oven to 325 degrees.
Combine graham cracker crumbs, cinnamon, and melted butter, stirring until it looks like sand. Press the mixture into the bottom and up the sides of the springform pan.
Bake for 10-12 minutes until fragrant and the edges begin to brown. Allow to cool completely.
You will need a water bath to bake your cheesecake.
You can either bring a large pot of water to a boil and pour it in the pan after you add the cheesecake, or you can fill your pan now with enough hot water so that it will come ½ way up the sides of your springform pan. Place that in the hot oven until ready to bake the cheesecake.
I like using a roasting pan with a flat rack inside. When the cheesecake has been baked, I can lift the entire rack out of the pan.

Beat 3 blocks of cream cheese on medium speed until smooth, scraping down the sides of the bowl and the beater as needed. You really need to make sure there are no lumps in the cheesecake and now is the time to get rid of them.
Add sugar and beat until light and fluffy. Add eggs one at a time and beat until creamy. Add sour cream and vanilla and beat until combined.

Scoop a ¼ cup of the filling into a small bowl and stir in the cocoa powder. Spoon the rest of the filling over the graham cracker crust. Smooth it out into an even layer.

Pour the cocoa-colored filling into a squeeze bottle or piping bag fitted with a small #2 round tip.
Begin by piping the tree trunk onto the cheesecake filling.

Add branches to the tree adding spirals at the tips, if you like.

And a few leaves, if desired.
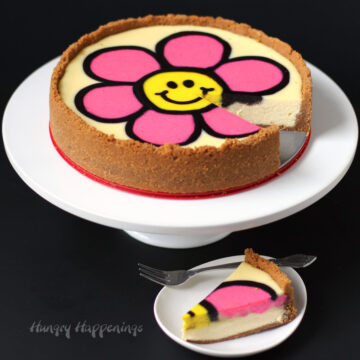
If making a multi-colored tree, you can use food coloring to add color. See my tutorial for the Decorated Daisy Cheesecake for detailed instructions.
Carefully carry your cheesecake to the oven and set it in your roasting pan. If needed, fill the roasting pan with boiling water being careful to not spill any water into your cheesecake.
Bake your cheesecake in a water bath for 35-40 minutes. The top will still jiggle, but look shiny and set.
Remove from the water bath, set on a cooling rack, and cool at room temperature for an hour.
Refrigerate for at least 4 hours and up to 4 days. To keep longer, you may cover and freeze for up to a month.

To make your nameplates, roll out the green fondant and cut out leaves using a leaf plunger cutter or cookie cutter.
Use a food coloring marker to write the names of your family members.
The fondant will get a bit sticky if refrigerated, so I suggest you add these nameplates just before serving.
 Ateco Set of 3 Sugar Paste ...Shop on Amazon
 Calphalon Simply Calphalon ...Shop on Amazon
 Squeezit Mold Painter Plast...Shop on Amazon
More Decorated Cheesecakes
from Hungry Happenings


Naturally Colored Conversation Heart Cheesecakes

Naturally Colored Happy Jack-O-Lantern Cheesecake
Have fun making your own Family Tree Cheesecake.

- How to make peanut butter? - February 15, 2024
- OREO Penguins - December 20, 2023
- OREO Snowmen - December 20, 2023

Karen @ Sugartown Sweets
I love your family tree cheesecake..and then I read the rest of your post. Hugs to you Beth.. I prayed a special prayer for you. My baby sister has struggled for years to have a child of her own. It's something she and her best friend have in common. After following your blog for several years now, it seems you really have been blessed with a gem for a Mom. I know she must have loved your family tree creation.
beth
Thanks, Karen. That is so sweet! I am very lucky to have such a wonderful mom and we had a lovely Mother's Day together. She even brought me flowers and a card, which was so nice.
The Partiologist
I can't tell you how much my mom would LOVE this cheesecake - family is everything to her!! 🙂
beth
My mom loved it too!